
Objective
This fourth grade science project is designed to introduce young students to the concept of magnetism by using everyday items they are most likely already familiar with.
Materials
Recommend groups of 3 to 5.
You will need the following for each lab station:

About 6 Ft bare (no insulation) light gauge electrical wire
About 3 Ft insulated wire. 12 gauge or smaller will be fine
About 1 Ft section of the same insulated wire.
2 to 3 inch section of ½ or ¾ in dia. copper tube
Steel bolt of your choice
Several paper clips
16-penny nail
#2 Pencil
D cell battery
Switch (optional)
In-line light (optional)
Compass
thick rubber band
2 to 3 inch piece of scotch tape
small piece of sandpaper
safety glasses or goggles
Preparation
We can use the optional switch and an in-line light source to show students that current is really flowing, but it is not necessary to demonstrate the concept. I plan to make that available in a fourth grade science project kit soon, so if you would like to set that up, let me know and I can help. To simplify the project, we will leave these out for now.
To save lab time, recommend doing the following in advance:
– Assemble the material in kits.
– Sharpen the #2 pencils so the students can see the lead core.
– Remove about 1” of insulation from each end of the insulated wire sections.
That’s it. Now it’s time to have fun …
Project Day
Before anybody gets the material out, we need to discuss a couple fourth grade science project safety items. First, we will be working with batteries. Yes, they are the same ones they use at home in flashlights, games, radios, etc. The difference here is that they will not be in a protective cover. Also, we will be hooking them up with wires. That does several things:
– The batteries will run down quickly if the wires are left on too long
– The batteries will get hot if left connected too long
– The wire will get hot if connected too long
– Rare, but a battery could rupture if connected too long
No panics here … just please insist they wear the safety glasses.
Then tell’em all to have fun with the experiment, but if the wire starts to get hot, disconnect it from the battery and wait a minute or two before continuing.
Now let’s get started …
Have the students take the battery, the 1 Ft section of insulated wire and the compass out of the fourth grade science project kit. Show them where North is, and mention that the compass should point there now. You might need to explain that a compass is really just a magnet, so it will also point toward metal, like screws and braces under the desk top. Have them move the compass around until it points as close to North as possible. This just gives them a reference point to start with.
Mention again about the wire getting hot if connected to the battery too long, then demonstrate how to hold the wire ends on the battery to complete an electric circuit. You can use the rubber band to keep the wire connected if desired.
Tell them that the current flows from the positive terminal (the one with a + sign by it) to the negative terminal. As the current flows in the wire, a magnetic field is created around it. We can see that in our fourth grade science project by watching the compass needle as we move it close to the wire.
Have one student in each group connect the wire ends to the battery, while another moves the compass around. If you have a fairly advanced class, tell them to put their thumb in the direction of the current (thumb pointing away from the positive terminal). If their fingers are straight out when doing that, they will be pointing in the direction the North end of the compass will point.
Then explain that the magnetic field really goes all the way around the wire, and if they curl their fingers while keeping the thumb pointed in the direction of the current, they can see what that means as well. (If they are having trouble grasping the concept at the fourth grade science project level … just leave this part out till next year!)
Have them move the compass around the wire to show that the magnetic field really does “push” the compass needle straight away from the wire all the way around. At some point, have them disconnect the battery to see what happens. They should see the needle point back toward North.
The photo below shows what they should see.

Making The Electromagnet Work For Us
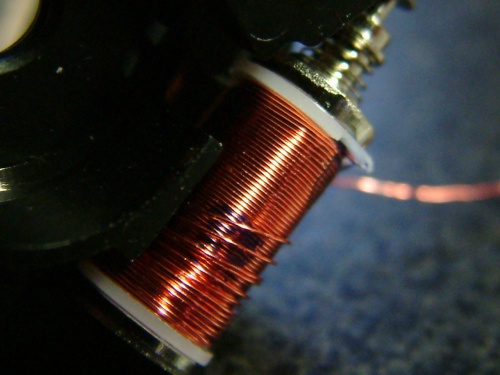
Have the students take the rest of the items out of the fourth grade science project kit. Have them carefully uncoil the wire without insulation on it. Take the small piece of sandpaper and lightly sand each of the wire ends to take off any coating that might prevent completing the battery circuit. (You can do this in advance for them if desired).

Leave at least 3 – 4 inches of loose wire on each end and wrap it fairly tightly around the bolt as many times as you can. Making the perfect coil is not important to our fourth grade science project, but do leave about ½ inch of one end of the bolt uncovered to pick up paperclips with in a minute.
Place the rubber band around the battery as shown, but do not connect the wires yet. Try to pick up a paperclip with the wrapped bolt. Does it work? It shouldn’t … we have not made a magnet yet.
Now go ahead and connect the ends of the wire to the battery. Try picking up the paperclips now. How many can you pickup at once? Does it seem like a pretty strong magnet? (Are the wires getting hot yet ???).
Disconnect the wire ends from the battery. Did the paperclips fall straight to the table top?
If you picked an iron bolt, the answer will be yes. If you picked a bolt that has steel in it, then it may take a minute or so for the paperclips to fall off. Steel bolts (or nails) tend to become magnetized themselves. A sharp blow with a hammer, or just waiting a few minutes can “de-magnetize” it, but we might not want to use steel for our industrial electromagnet if we want it to “turn off” quickly. To review what is happening here, take a quick look at how magnetism works.
But we are not done yet…
Unwrap about half to 1/3 of the wire so that just a few strands of the coil are on the bolt. The next step requires a bit of concentration as there will be several feet of wire dangling toward the floor … but that’s ok. Continue on with the fourth grade science project by connecting the loose ends of the wire to the battery again.
Does it pick up as many paperclips? Does it seem to be as strong as before? The answer should be no to both questions. The strength of the magnetic field is directly related to the number of turns in your coil. The more turns, the stronger the magnetic field, and therefore, the stronger the electromagnet becomes.
Go ahead and unwrap the rest of the wire off the bolt. If you have time, repeat this with the insulated wire. If not, that’s ok … but the insulated wire is used to show that our electromagnet does not depend on the wire touching the core material. In other words, it is not a wire-contact issue. It is the magnetic field generated by the electrons moving in the wire that “magnetizes” the core.
Testing different Core materials

Take the small copper tube out of the fourth grade science project kit. Leaving about 3 to 4 inches of loose wire on each end, wrap the un-insulated wire tightly around the copper tube as many times as it will go. Neatness is not required. Just wrap it tight. When done, put a small piece of scotch tape on the coil to help hold the wire in place.
Have one student hook up the battery again, and another place different cores inside the copper tube. If you start with the same bolt as before, what happens? You should have a magnet that is just about as strong as the first.
Try the pencil. The lead that runs through it is metal … so what happens? You should see that the lead pencil will not have enough magnetic strength to pick up even one paper clip.
Try the nail. Most are made of steel so after the first couple of attempts to pickup multiple paperclips (which should be successful), be sure to disconnect the battery with the clips still on the nail to see what happens. If the nail was used as the electromagnet’s core long enough, you should see the paperclips falling off from the last one up to the one touching the nail itself. It may even take a minute or two, and the reasons are the same as we discussed above.
You will find that copper is a great conductor of heat, so be sure to disconnect the battery for a couple minutes between each trial.
So What Just Happened?
For the teacher – the success of this fourth grade science project depends two things. 1) That a magnetic field is created as a result of electrons moving through our wire, and 2) we select a core that also has magnetic properties like iron or steel. The strength of the magnet will depend on the strength of our power source, as well as the type of material we select for the core and the number of turns of wire we have in the coil around it.
For the students – we can turn an ordinary nail or bolt into a very strong magnet just by running an electric current around it. Our fourth grade science project shows that we can control how strong this magnet is just by increasing or decreasing the number of turns we have in our coil that we wrap around that bolt or nail core. If we use an iron core, all the paperclips fall off as soon as we take the wire ends off the battery. If we use a steel one, the core can become magnetized, and the paperclips will take longer to fall off.
… That’s it for this fourth grade science project. It’s time to put everything back in the fourth grade science project kit box until next time.
But – – -be sure to check back in a few days … making a generator with just magnets and wire is next!!
If you can’t wait, or you would like a more off-the-shelf product to explore electro-magnetism and other magnet projects, these will help:


Attracted to things magnetic? Here is another project for you: https://how-things-work-science-projects.com/compass-deflection/